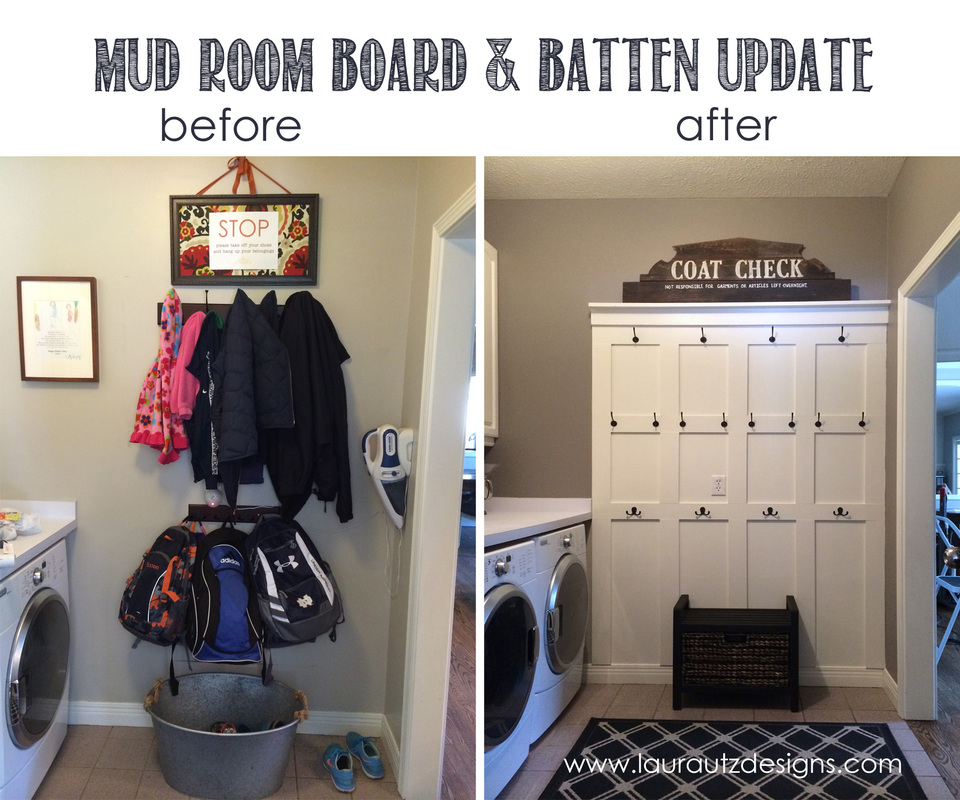
Sometimes, you just don't have the space for a huge custom-designed mud room filled with organized lockers or cubbies like we see (and drool over...) on Pinterest for all of the kids' STUFF. But the reality is, they have a ton of stuff. The other reality is that we often have to make do with the space we have. But sometimes, we can think outside of the box and try to make that given space more functional and if we're lucky...maybe even a little bit cuter.
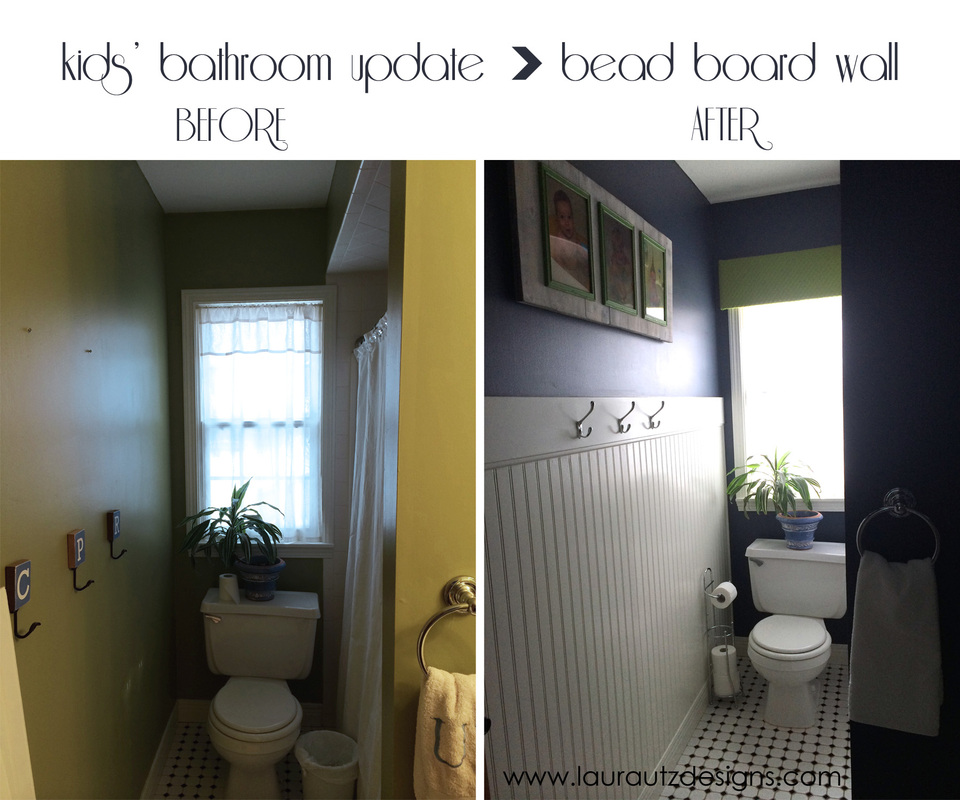
Left photo: Disorganized chaos of unaccessible backpacks and jackets.
Right photo: Organized and adequately spaced hooks. PLENTY of hooks. Like, "there's absolutely no excuse for a kid to plop their belongings on the floor when they walk in the door" amount of hooks.
Left photo: Disorganized chaos of unaccessible backpacks and jackets.
Right photo: Organized and adequately spaced hooks. PLENTY of hooks. Like, "there's absolutely no excuse for a kid to plop their belongings on the floor when they walk in the door" amount of hooks.
I went to my favorite gals' site over at Shanty 2 Chic for a tutorial on this little project. These girls are amazing and are a great resource for DIY projects.
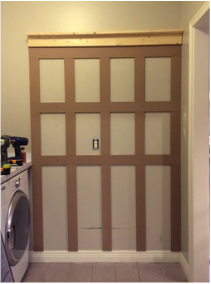
I measured (which is most of the work!) and designed my wall then headed to Home Depot. To the left is a photo of the wall with the battens secured. I used Liquid Nails panel adhesive and my Ryobi brad nailer to secure everything. Then I caulked, painted, screwed the hooks and then of course...painted my walls a new color.
The wood cost me about $30 and the hooks cost me about $25 total at Hobby Lobby.
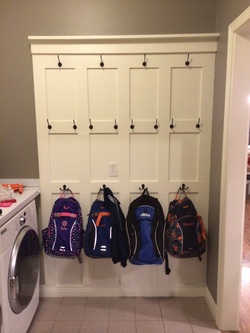
Testing out the hooks...MUCH better! :)
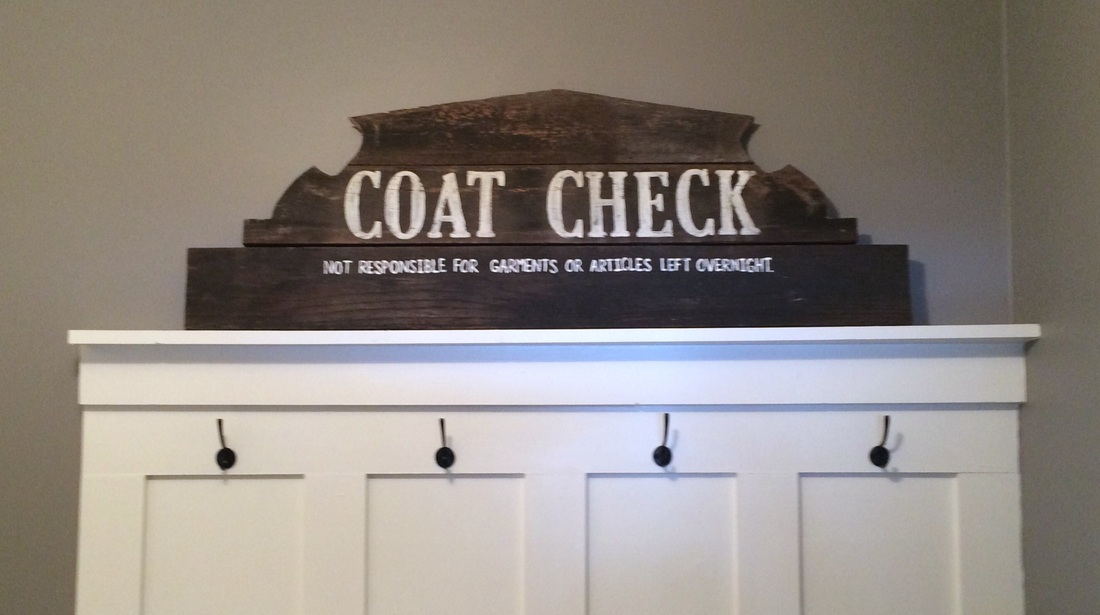
The left photo below is my inspiration from Ballard Designs. I wanted to create a fun "Coat Check" sign that had an interesting shape. I used some reclaimed wood I had and my jig saw to create the sign. I then added the "Coat Check - not responsible for garments or articles over night" text to it. Note: the photo is taken faaaaaar back so you cannot see the horrific free-handed painting of the text! Ugh.


GO PLAY OUTSIDE sign with an arrow, pointing to the door, of course:)
This is the ONLY time that my mud/laundry room ever looks like this - completely bare. It is typically filled with shoes, boots, jackets, snow pants, back packs, & lunch bags. And the counters? They're usually covered with my crafting tools. Oh well. It's nice to see them bare for this brief moment...ha!
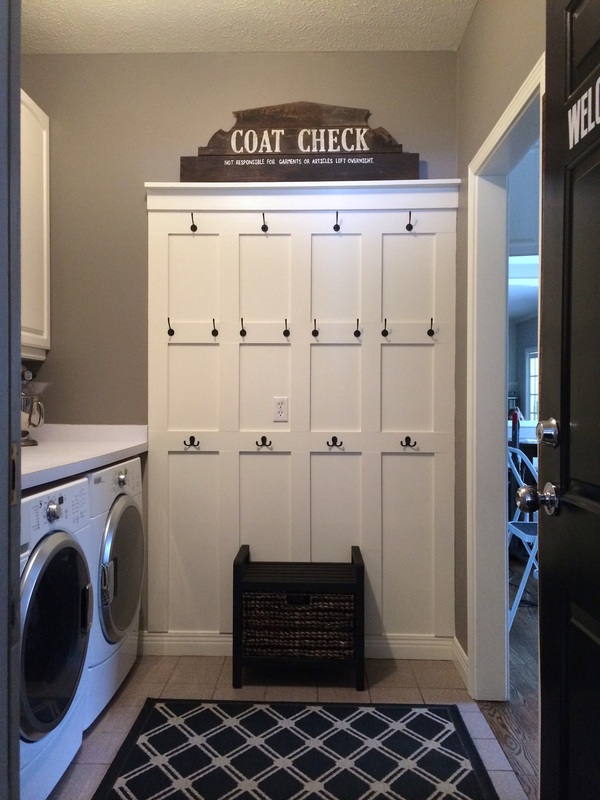
Small bench with shoe basket found at Homegoods. It was brown, and I painted it black.
Rug found at Ballard Designs.
Wall paint: Benjamin Moore - Galveston Gray AC-27 - LOVE this color + have it in 4 rooms in my home!
Rug found at Ballard Designs.
Wall paint: Benjamin Moore - Galveston Gray AC-27 - LOVE this color + have it in 4 rooms in my home!


 RSS Feed
